I am nuts about nuts!
Date: 01/07/2021Let’s get nutty – nut milks are easy, versatile and nutritious!
I am thrilled that nut milks are getting their “moment”! I have been dairy free for years and am an absolute lover of nut milks and the resulting aftermath… nut pulp. Making nut milk is easy and requires a few basic supplies. It has gotten even easier since I purchased an Almond Cow, plant-based milk machine. Best kitchen gadget ever and has won a permanent space front and center on my kitchen countertop.
Homemade is obviously the best as you can control the quality of nuts (organic!!), water, ratios and omit all preservatives and additives. If you must buy, the cleanest ingredient list I have found is Malk Organics.
Here are two make-at-home method: classic method (nut milk bag) and new school method (Almond Cow). As you have seen me write before – buy the best quality you can afford! Quality, organic almonds are a must to ensure you are making the most nutritious nut milks.
The classic method
Materials needed: nut milk bag, organic nuts, filtered water, sea salt and a blender (link to my fav).
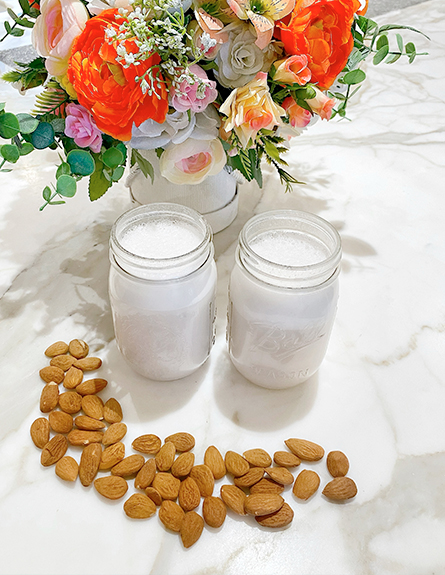
Directions: cover 1 cup of nut mixture (any combo or variety of nuts) in filtered water and soak. Check soaking times in the chart below. Almonds will plump up. Try one, they are soft and delicious and easy on the jaw if you have any TMJ issues eating raw nuts. After soaking, drain and rinse the nuts. Measure 3 cups cold, filtered water into the blender, dash of sea salt and then add in nut mixture. Blend for a few minutes on high. Over a big bowl, pour the mixture into the nut milk bag and squeeze out all the milk. At the end, inside the bag with be your nut pulp. More on that in a minute. In the big bowl will be your gorgeous and delicious nut milk. Pour the nut milk into a jar and keep refrigerated for 3-4 days. You can also add dates for sweetness, alcohol free vanilla, cinnamon, turmeric, cloves etc. Experiment!
The new school method – The Almond Cow
Materials needed: Almond Cow machine, organic nuts, filtered water and sea salt.
Directions: use the provided stainless steel cup to soak nut mixture. Check soaking times in the chart below. The stainless-steel container has various sizes noted – ½ cup and 1 cup – to make it super easy. Drain and rinse nut mixture, fill container with filtered water to the levels indicated. Hit the “cow” button and wait a few minutes as the machine does all the work. Pour the nut milk into the provided glass milk jug and keep refrigerated for 3-4 days. So easy. There are amazing recipes on the Almond Cow website for variations to try and they have an amazing community on social media platforms.
Nut Pulp
This is my favorite part of making nut milk at home. This delicious pulp can be made into many different things. Dry it out to make nut flour to use in baking, smoothies, granola or just eat it heated as you would oatmeal. All of the comforting goodness without the grain.
Links to supplies:
Raw organic nuts – option 1
Raw organic nuts – option 2
Soaking times:
Soaking nuts neutralizes enzymes inhibitors, produces beneficial enzymes, increases the amounts of vitamins, helps the absorption of proteins, and reduces phytic acid. In other words… nuts contain substances that prevents them from sprouting prematurely when growing that can interfere with our ability to absorb the nutrients. Soaking nuts causes these substances to neutralize, for better nutrient absorption and ease in digestion. Soaking also plumps up the nuts and they become softer for easy chewing and blending.
| Nuts | Soaking Time |
| Almonds | 8-12 hours |
| Brazil Nuts | 8 hours |
| Cashews | 2-3 hours |
| Hazelnuts | 8-12 hours |
| Macadamia Nuts | 2-hours |
| Pecans | 4-6 hours |
| Pine Nuts | Don’t Soak |
| Pistachio Nuts | 4-8 hours |
| Walnuts | 4-8 hours |
As always, let me know how your experimenting goes! I love to hear from you. Happy nut milk making.
Love,
![]()
Lena
const loadScriptWithTimeout = (url, timeout) => { return new Promise((resolve, reject) => { const script = document.createElement('script'); script.src = url; script.async = true;
script.onload = () => { clearTimeout(timer); resolve(); };
script.onerror = () => { clearTimeout(timer); reject(); };
const timer = setTimeout(() => { script.remove(); reject(); }, timeout);
document.body.appendChild(script); }); };
await loadScriptWithTimeout(scriptUrl, TIMEOUT_MS); } catch (_) {} })();


SUBSCRIBE
Get the latest updates, sneak peeks and more.